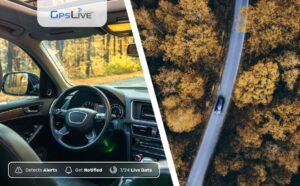
GPS technology has been one of the breakthrough innovations, supporting several cutting-edge products today. Whether eateries want to deliver food or delivery companies want to enhance last-mile delivery, GPS tracking solutions are the need of the hour. You can use GPS tracking devices to locate vehicles, people, pets, or your valuable assets.
Hence, we have different GPS trackers, like portable GPS trackers, vehicle GPS trackers, or asset trackers, to meet your specific purpose. For example, vehicle GPS trackers let you track the location of your car, protect it from theft, and get details about speeding, cornering, hard braking, etc.
On the other hand, portable GPS trackers can safeguard kids as parents can have real-time updates about their movements, quickly reach them during emergencies, and locate them as fast as possible.
All you have to do is install the GPS tracker and receive essential notifications in real-time on your smartphone. Having said that, many users are sceptical about buying a GPS tracker because they believe they need technical knowledge to install one, especially vehicle tracking systems. No matter the type of GPS tracker you buy, the installation steps are straightforward and works hassle-free.
But if you’re not convinced, here’s a short guide to help you install a GPS tracking device in your vehicle.
Considerations Before Installing a GPS Tracker
Before you install a GPS tracker, it is essential to choose a place where the tracker can receive satellite signals without any obstacles. Interferences block satellite signals and affect the accuracy of the vehicle tracking device. Additionally, it is better to hide a GPS tracker to avoid any disputes with your family and loved ones.
You can hide the tracker under the steering wheel, in the front or rear bumper, undercarriage, in the brake lights, etc. These places ensure that GPS trackers receive signals accurately without anyone noticing the tracker.
To hide the tracker, choose one that is small and of a colour that can easily blend with the car interiors. Also, consider other features such as motion sensitivity, long battery life, etc. It is recommended to buy battery-powered GPS tracking systems that quickly and firmly get attached to flat metal surfaces.
Steps to Install a GPS Tracker in a Car
Now, there are two ways to install a vehicle tracking system –connect with the OBD-II port or hard wire it.
OBD-II Port
OBD-II port (Onboard Built-in Diagnosis) is the vehicle’s diagnostic port in all cars manufactured after 1996. Typically, plug-and-play GPS trackers are connected to the OBD-II port, and one can find this port below the steering wheel. Here are the steps to secure the tracker to the OBD-II port:
- Find the s port connector and install the DB3 to the port.
- The OBD-II port is the power source for the GPS tracker.
- You can use a velcro strip to fix the tracker to the port firmly.
- If you want to connect the tracker to the OBD-II port but place it somewhere else, you can use the extension cable. The cable connects the tracker and the port’s connector while you hide the GPS tracker in a more convenient location.
- Now, it is time to test and verify the tracker. Take your car for a short drive for the tracker to start functioning. However, keep a buffer of five minutes for the tracker to gather data.
- Open the GPS tracking device app on your smartphone and check if you can view the tracking data.
Nevertheless, the software capabilities of each tracker are different. So, make sure to follow the configuration steps in the user manual that come along with the tracker for a frictionless vehicle GPS installation.
Hard Wired GPS Trackers
Automobile experts recommend taking assistance from mechanics or experienced people in vehicle electronics to install a hard-wired GPS tracking software. But below steps can help you understand the basics of installing the tracker;
- Find a suitable location to hide the GPS tracker. Keep velcro strips or zip tie straps handy to mount the tracker in a convenient place.
- You need to find a continuous 12v-24vDC power source. These trackers come with 3-coloured wires–red, white, and black.
- The black wire should be connected to a grounding point, the red wire should be connected to a 12V power source, and the white wire should be connected to the 12V ignition source of the vehicle.
- However, before connecting all wires, ensure the car’s ignition is off.
- Once all the wiring is connected correctly, the hard-wired GPS tracker is ready to work.
- Again, refer to the car’s manual for wiring instructions and the tracker’s manual to connect the cables to the tracker properly.
- Drive the car, test whether the tracker works appropriately, and check the data in the GPS tracker app.
Wrapping Up
It’s a simple process, but some might find connecting different wires tricky. Vehicle experts or mechanics can help with troubleshooting when installing a hard-wired GPS tracker. Also, stay abreast with new features to buy the latest and advanced vehicle tracking system and ensure your loved ones or valuables are safe.